Table of Contents
Kinsta staging lets you create a one-click copy of your live site to test plugin updates, code and design changes safely, then push them live. It is included on every plan and takes a couple of minutes to create. This guide shows how to set up Kinsta staging, test on it, and deploy changes without any live-site downtime, plus how it pairs with the free DevKinsta tool.
Last updated: August 2026. Staging details were read from kinsta.com. This page carries affiliate links to Kinsta, and it is clear that standard staging is free while premium staging with dedicated resources is a paid add-on.
How Do You Set Up Staging on Kinsta?
You set up Kinsta staging with one click in MyKinsta, which creates an exact copy of your live site where you can test changes safely. It is included on all plans and takes a couple of minutes to create, so risky updates never need to be tested on the live site again.
Verdict: Kinsta staging is a one-click clone of a live site, included on every plan, where you test updates and push verified changes to production so visitors never see anything broken. Two honest points: standard staging is free while premium staging with dedicated resources is a paid add-on, and pushing to live lets you choose files, the database, or both to avoid overwriting recent content.
The clearest way to use it is to see what staging is for, then create one, test on it, and push, which the sections below set out step by step.
“WordPress is a web content management system.”
— Wikipedia, WordPress
Staging gives that content management system a safe rehearsal space, so changes are proven on a copy before they reach the live site visitors use.
What Is a Staging Environment For?
A staging environment is a private copy of a live site used to test plugin and theme updates, new code or design changes before they reach visitors. On Kinsta the staging site mirrors production on the same premium servers, so what is tested is what you get when it goes live.
The practical value is that a broken update or a conflicting plugin surfaces on the copy rather than on the live site, so the fix happens before any visitor is affected.
How to Create a Kinsta Staging Site Step by Step
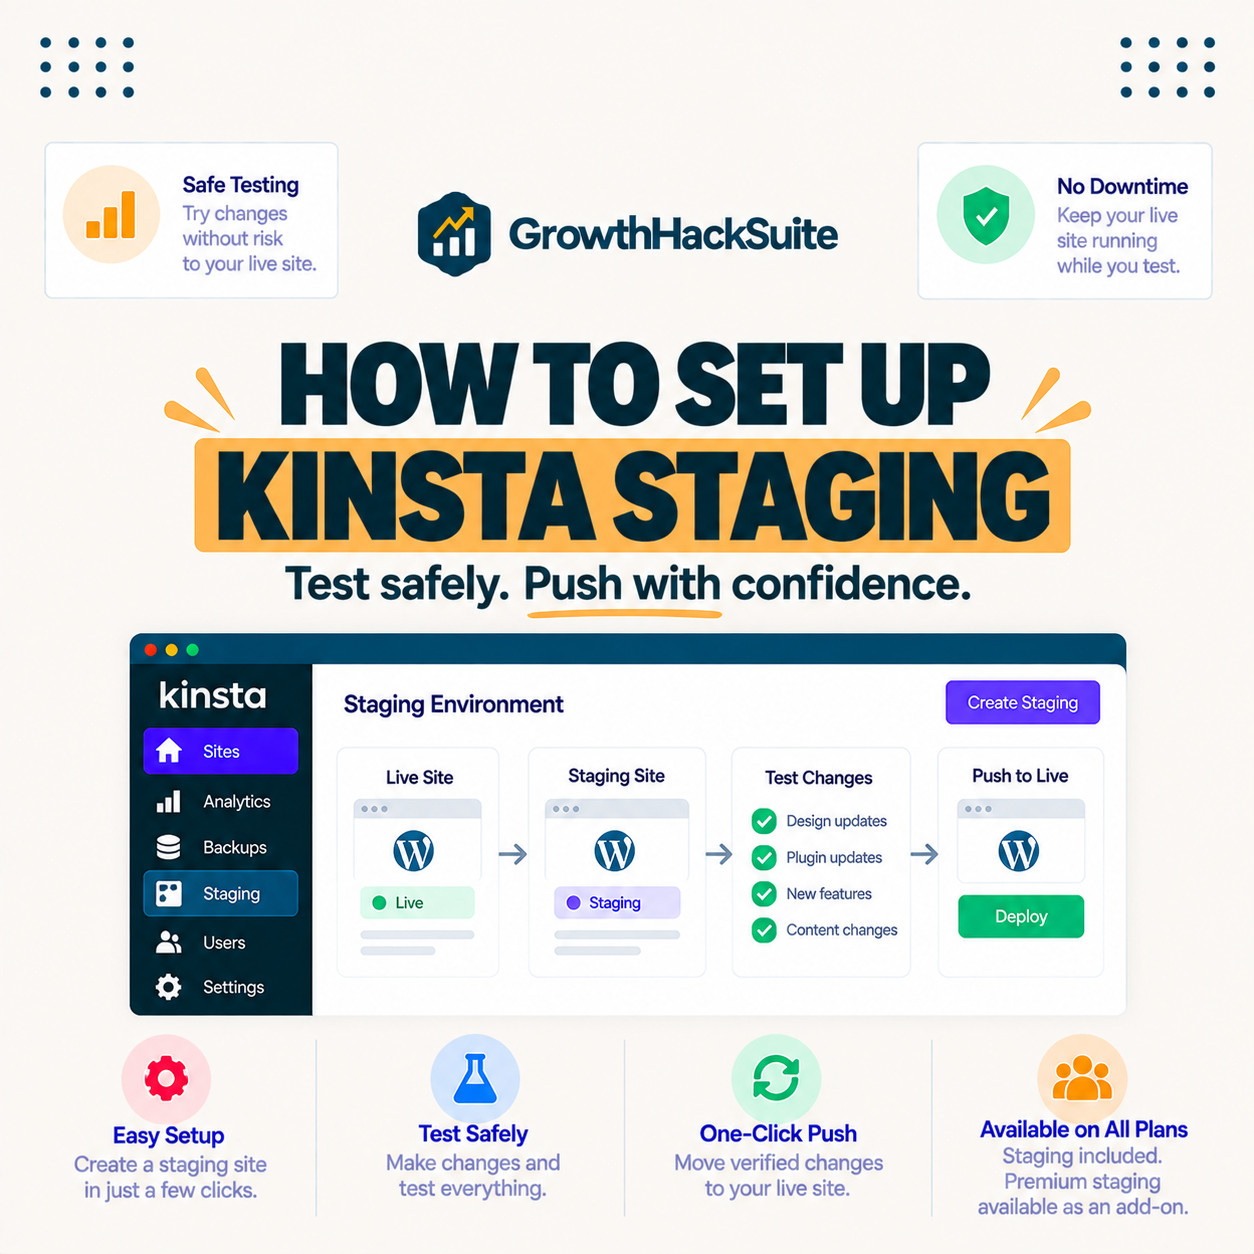
To create Kinsta staging, open the site in MyKinsta, select the environment control, and click to create a staging environment. Kinsta clones the files and database within a couple of minutes, giving a separate URL to work on, where changes are made and tested before pushing to live.
- Open the site in MyKinsta: Select the site whose live environment needs a staging copy.
- Create the staging environment: Use the environment control to create staging with one click.
- Wait for the clone: Kinsta copies the files and database into an isolated staging environment within a couple of minutes.
- Open the staging URL: Work on the private staging URL Kinsta provides, separate from the live site.
- Make and test changes: Apply updates or edits on staging and confirm they work before pushing to live.
The honest summary is that creating staging is a one-click, couple-of-minutes task, so the real work is testing thoroughly on the copy.
How to Test Safely on Staging
Test safely on staging by updating plugins and themes, trying new code, and checking key pages and forms there first. Because staging mirrors production, issues surface before they affect visitors, so conflicts are fixed without any live-site downtime.
- Apply updates first: Run WordPress, theme and plugin updates on staging to confirm nothing breaks before touching live.
- Check key pages: Load the homepage, top posts and important templates on staging to confirm they render correctly.
- Test forms and checkout: Submit forms and, for a store, test checkout so interactive features are verified on the copy.
- Try new code in isolation: Add custom code or a new theme on staging, where a mistake cannot affect the live site.
- Review before pushing: Confirm the tested result is correct on staging before deploying it to production.
The honest takeaway is that staging is only useful if the testing is thorough, so a short checklist across updates, pages, forms and code is what makes it reliable.
How to Push Staging Changes to Live
When changes are tested and working, use the push-to-live option in MyKinsta to deploy staging to production. You can push files, the database, or both, and Kinsta handles the swap, so visitors only see the finished, verified result of the work.
The important choice is what to push: on a site collecting new content or orders on live, pushing only files avoids overwriting the live database, which is a common way changes go wrong if pushed carelessly.
The Kinsta Staging Workflow at a Glance
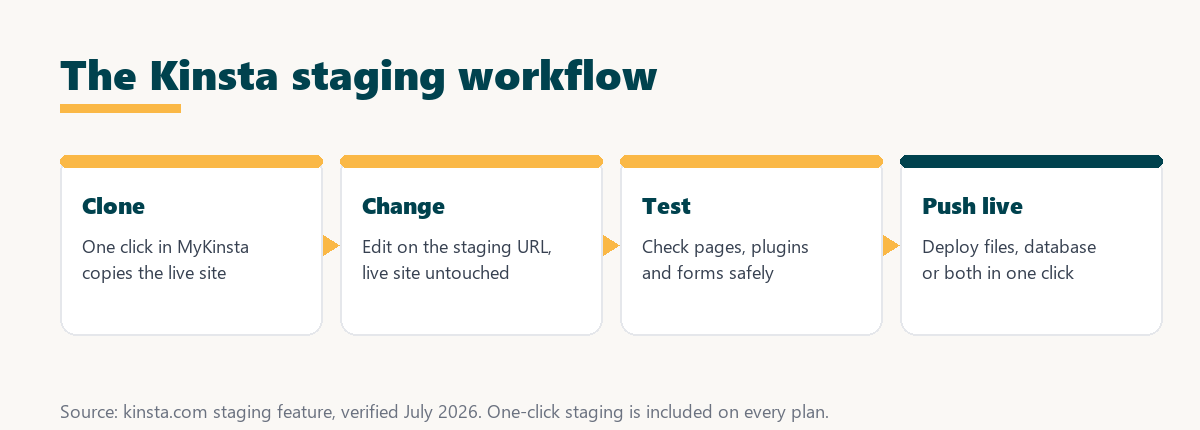
The staging workflow is a short loop of clone, change, test and push, repeated whenever a site needs updating. The table lays out each step and its result.
Source: kinsta.com staging feature, verified August 2026. Push to live lets you choose files, the database, or both.
In plain terms, you clone with one click, test on the copy, and push verified changes live, so visitors never see anything broken.
How to Use DevKinsta With Staging
Pair staging with DevKinsta, Kinsta’s free local development tool, to build offline first, then push to staging to verify on real servers, then to live. This local-to-staging-to-live pipeline reduces errors and gives a clean, professional workflow from development to production.
The honest note is that DevKinsta is free and separate from hosting, so the full pipeline is available at no extra cost once a site is on Kinsta, with local work happening before staging.
How to Verify Staging Matches Production
Verify staging matches production by confirming it uses the same PHP version, plugins and data as live, since Kinsta clones the full environment. Testing on an accurate copy is what makes staging reliable, so reviewing that nothing important differs is worth the moment it takes.
“The first five seconds of page-load time have the highest impact on conversion rates.”
— HubSpot, page load time and conversion rates
Because a broken deploy can cost those first seconds on the live site, testing on an accurate staging copy protects the speed and reliability that conversions depend on.
One-click staging on every plan
See Kinsta Plans →Test safely and push with confidence, with a 30-day money-back guarantee.
Is Staging Included in Kinsta Plans?
Yes, one-click staging is included on all Kinsta plans starting at 35 dollars a month, with no extra fee. Higher tiers add more resources, but standard staging is available at every level, so every site can test changes safely.
Source: kinsta.com pricing and kinsta.com/plans, verified August 2026. Standard staging is free on every plan; premium staging with dedicated resources is an optional paid add-on.
Put simply, one-click staging is included on every Kinsta plan, so you can test safely regardless of tier, with DevKinsta adding free local development.
Staging included from the entry tier upward
View Kinsta Pricing →One-click staging on every plan, with DevKinsta free for local development.
What Is Premium Staging on Kinsta?
Premium staging is a paid upgrade that runs a staging copy on dedicated resources, so intensive testing or a full development pipeline does not compete with the live site’s performance. Standard staging is free and enough for most sites, while premium staging suits heavier workflows.
The honest guidance is that most sites never need premium staging, and it is worth the cost only when a team runs demanding, continuous testing that would otherwise draw on the live site’s resources.
What Are Common Staging Mistakes to Avoid?
Common staging mistakes are forgetting to push database changes when needed, testing on an outdated staging copy, and pushing to live without reviewing. Refreshing staging before major work and reviewing changes before deploying prevents these issues and keeps the live site safe.
- Testing on a stale copy: An old staging copy may miss recent live changes, so refreshing it before major work keeps the test accurate.
- Overwriting the live database: Pushing the database can overwrite new orders or content, so choosing files-only when appropriate avoids data loss.
- Pushing without review: Deploying untested or unreviewed changes defeats the point of staging, so a final check is essential before pushing.
- Forgetting database changes: Some changes live in the database, so pushing only files can leave a needed change behind if the database is skipped.
- Leaving staging public: A staging URL should stay private, since an exposed copy can be indexed or accessed unintentionally.
The honest takeaway is that staging is safe when refreshed, reviewed and pushed deliberately, and the mistakes above are the few ways it can still go wrong.
Is Kinsta Staging Worth Using?
Kinsta staging is worth using for any site where a broken update would cost visitors or sales, since testing first prevents downtime and errors. It is free, one-click and mirrors production, so there is little reason not to use it before deploying changes to a live site.
“A tool is only worth its premium when the hours or revenue it protects exceed the invoice.”
— Growth Hack Suite, on tool ROI
Since standard staging is free, its return is purely the downtime and broken deploys it prevents, which on a revenue site easily clears the bar. Teams weighing platform dependence can read our note on SaaS vendor lock-in before standardising a workflow on one host.
How Do You Get Started With Kinsta Staging?
To get started, open the site in MyKinsta, create a staging environment with one click, and make the changes there. Test thoroughly, then push to live when ready. Free migration and the 30-day guarantee let a real site be set up risk-free before committing.
The honest summary is that the setup is a one-click, minutes-long task, so the habit worth building is simply testing on staging before every meaningful change to a live site.
Test safely on a real site risk-free
Try Kinsta Risk-Free →Free migration and a 30-day money-back guarantee.
Kinsta Staging: Frequently Asked Questions
The 12 most-asked questions about Kinsta staging.
How do I set up a staging site on Kinsta?
In MyKinsta you open the site’s environment control and click to create a staging environment, and Kinsta clones the files and database into an isolated copy within a couple of minutes.
How long does it take to create Kinsta staging?
Creating a Kinsta staging environment usually takes only a couple of minutes, after which you get a private URL to work on the cloned site.
How do I access my Kinsta staging site?
Kinsta gives each staging environment a private URL opened from MyKinsta, letting a team view and test the cloned site without exposing it publicly.
How do I push Kinsta staging changes to live?
After testing, use the push-to-live button in MyKinsta and choose whether to move files, the database, or both, and Kinsta copies the staging changes to production.
Can I push only files or only the database?
Yes, Kinsta lets you select files, the database, or both when pushing to live, which helps avoid overwriting new content or orders created on the live site.
Is a Kinsta staging site isolated from live?
Yes, staging runs in a separate environment, so testing updates or breaking code there has no effect on the live site visitors are using.
How do I test plugin updates using staging?
Create a staging copy, apply the WordPress, theme or plugin updates there, confirm nothing breaks, then push the verified changes to live so production stays safe.
Do I need a special plan for Kinsta staging?
No, a standard staging environment is included free on every Kinsta plan, and premium staging with dedicated resources is available as an optional add-on for heavier workflows.
Can my team collaborate on a staging site?
Yes, using MyKinsta user management you invite team members with roles, so developers and editors can work together on the staging environment before changes go live.
What is premium staging on Kinsta?
Premium staging is a paid upgrade that runs a staging copy on dedicated resources, so intensive testing or a full development pipeline does not compete with the live site’s performance.
How do I refresh a Kinsta staging environment?
From MyKinsta you can rebuild staging from the current live site to get a fresh copy, or remove it when finished, keeping the environments tidy and accurate.
What should I check before pushing staging to live?
Before pushing, test key pages, forms and checkout on staging, back up the live site, and decide whether to move files, the database or both to avoid overwriting recent content.
About this guide
Written by the Growth Hack Suite editorial team. Staging details were read from kinsta.com. This page carries affiliate links to Kinsta, so the honesty owed to a reader is stated plainly: one-click staging is included on every Kinsta plan from 35 dollars a month, clones the full environment, and lets you push files, the database, or both to live. Premium staging with dedicated resources is a paid add-on for heavier workflows, and the free DevKinsta tool adds local development before staging. Standard staging is free, so its value is the downtime and broken deploys it prevents.